Making Changes with Claude Code
Now that Claude Code has created your project and you are able to view it on your system, you’ll want to make changes and improvements. Here’s how!
Making Changes
Section titled “Making Changes”Want to tweak something? You have two options:
Method 1: Ask Claude Code (Recommended)
Section titled “Method 1: Ask Claude Code (Recommended)”The easiest way - just tell Claude Code what to change or share some screenshots or design images (only PNG, GIF, WebP, JPEG images are supported, no PDFs)
Change the heading font to something more playfulMake the buttons bigger and add rounded cornersAdd a footer with copyright informationMethod 2: Edit Files Yourself
Section titled “Method 2: Edit Files Yourself”You can also edit files directly using any text editor:
- Open the file in a text editor (VS Code, Notepad++, TextEdit, etc.)
- Make your changes
- Save the file
- Refresh your browser to see the changes
Save Your Progress with GitHub Desktop
Section titled “Save Your Progress with GitHub Desktop”After making changes to your project, let’s save them with GitHub Desktop:
Step 1: Open GitHub Desktop
Section titled “Step 1: Open GitHub Desktop”- Switch to GitHub Desktop.
- Click on ‘Fetch Origin’ incase you want to fetch the changes Claude Code has made and verify locally.
- If you have made any changes manually in the editor, you should see your new files listed in the “Changes” tab.
Step 2: Review Your Changes
Section titled “Step 2: Review Your Changes”Click on the files to see what was created or modified. All the changed files should be checked.
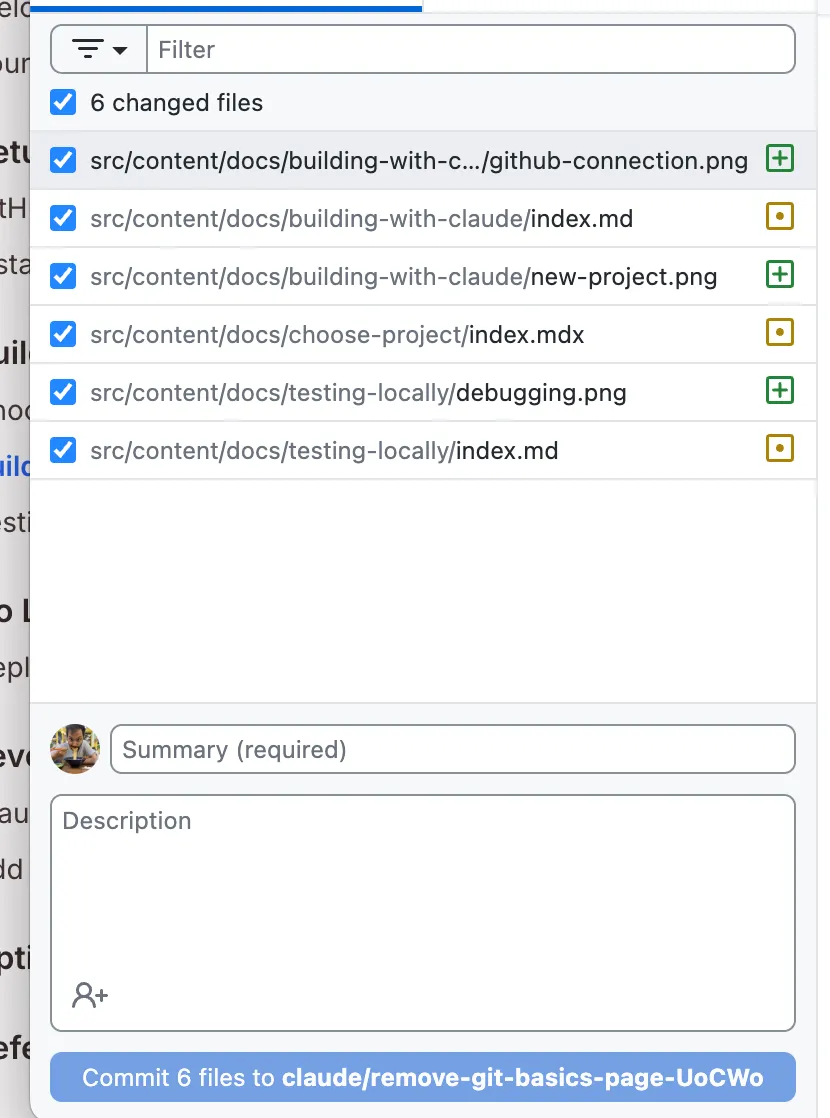
Step 3: Commit Your Changes
Section titled “Step 3: Commit Your Changes”- In the “Summary” field at the bottom left, type something that describes the changes you made
- First time:
Initial project created with Claude Code - After changes:
Updated button styles and added footer
- First time:
- Click the “Commit to branch” button
You know how to make changes and save your progress. Ready to put it on the internet?
Best Practices
Section titled “Best Practices”1. Commit Often
Section titled “1. Commit Often”Save your work frequently with meaningful commit messages. This creates a history you can refer back to.
2. Test Before Committing
Section titled “2. Test Before Committing”Always view your changes in the browser before committing to make sure they work as expected.
3. Write Clear Commit Messages
Section titled “3. Write Clear Commit Messages”Instead of “updates” or “changes”, write:
- “Add contact form with validation”
- “Fix navigation menu alignment”
- “Update color scheme to blue”
You can even ask Claude to help you write these.
Next Steps
Section titled “Next Steps”In the next section, we’ll learn how to deploy your project to github pages and make it accessible on the internet.